
Subtitle a Video
Subtitling: Panel Discussion From Barriers To Belonging Building Diverse & Inclusive Tech Communities
Instructions
Adding captions or translations is a great way to take your favorite WordPress.tv video and share it with an even broader audience! It is easy to help us with this goal by submitting a caption or translation file for your favorite video. Just follow the steps below!
The below steps are out of date. A work is in progress to improve them.
Step-by-step video
Need to be created
Text instructions – Creating and uploading a new caption file
Tools used:
- Vibe (transcription)
- Subtitle Edit (translation & editing)
- GoTranscript Converter (SRT → TTML)
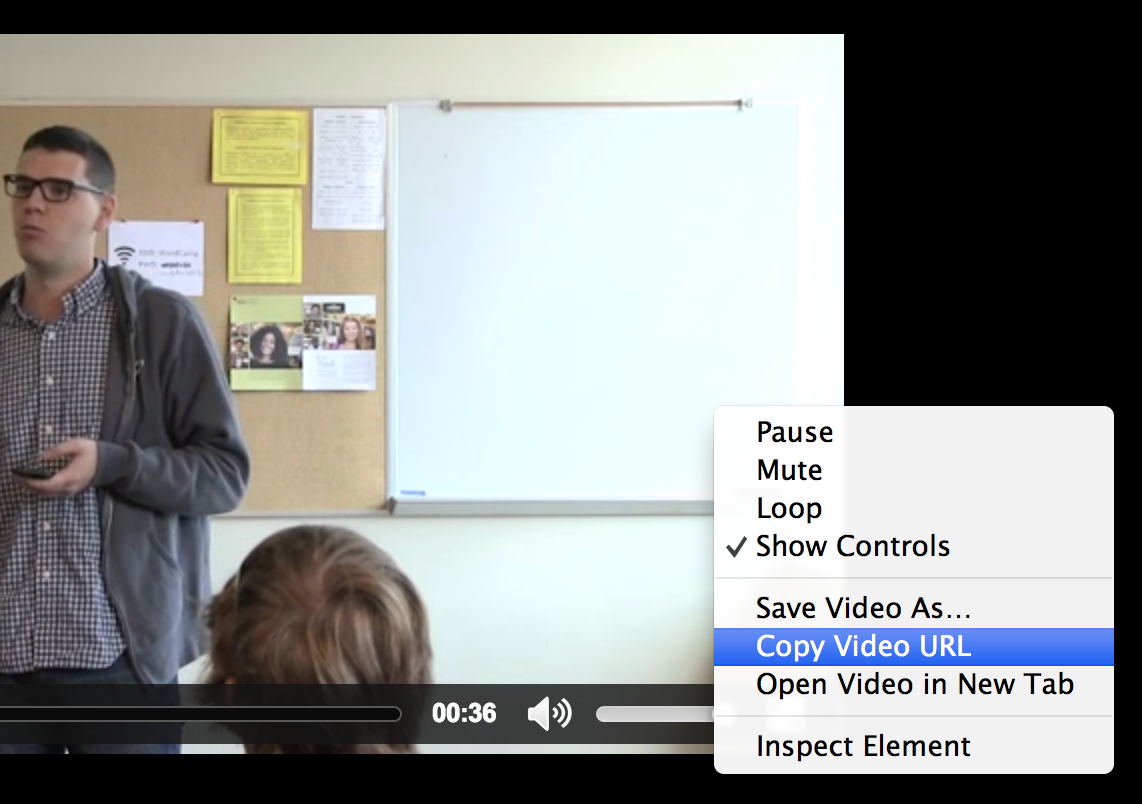
Step 1 – Copy the video URL
Locate the “Med” or “Low” link in the Download section of the sidebar.

Right-click on that link and select the option that will copy the video URL. Each browser has slightly different terminology for this. Yours may say “Copy Link”, “Copy Link Address”, “Copy Link Location”, “Save target as” or something similar.
Step 2 – Extract subtitles from the video
- Open Vibe and load the MP4 file
- Vibe automatically transcribes the speech in the video language
- Download the result as an SRT file (*.srt)
Step 3 – Translation (Subtitle Edit)
- Open Subtitle Edit
- File → Open – load the *.srt file.
- Run auto-translation: `Auto translate → Auto translate…`
– Engine: Google Translate V1 (free, no API key needed)
– Source: Video language / Target: English or any other WP language
– Click Translate - Both languages appear side by side
Step 3 – Proofreading & Correction
Review and correct both tracks, the original transcription and the English translation. Automatic transcription and machine translation are not perfect, especially with proper names, technical terms, or unclear audio.
When done, save both files separately. It’s a good habit to add the language to the filename (e.g. `video_pl.srt` and `video_en.srt`) so both files are easy to tell apart.
If you already have two separate files (PL + EN) and want to open them together: `File → Open` (English) + `File → Open Original` (Polish)
Step 4 – Convert *.srt to *.ttml (GoTranscript)
- Go to https://gotranscript.com/subtitle-converter
- Upload the *.srt file
- Select TTML as output format
- Download the *.ttml file
Step 4 – Upload your caption file
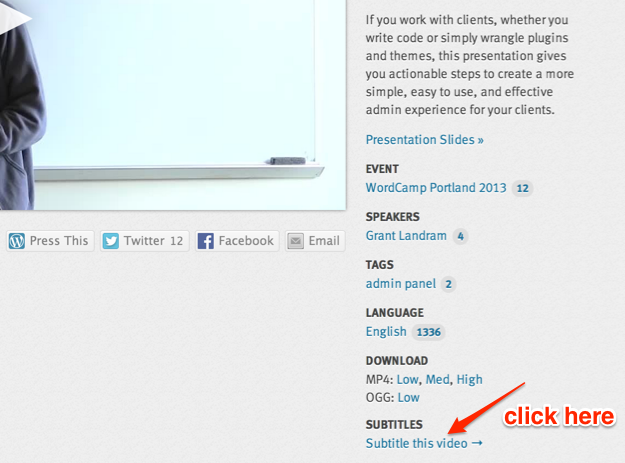
Return to the WordPress.tv video page, and click on the “Subtitle this video” button at the bottom of the sidebar.
On the next page, choose your file for upload, select your language from the drop-down selector, and then click Submit button. 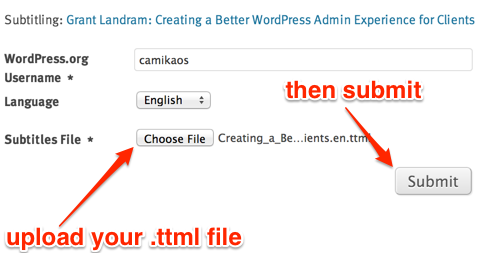
Success! Your subtitles will go through a short moderation process, and then you can enjoy your newly captioned video in all its text-enriched glory. Thank you for helping out! 🙂
Translating an existing caption file
In cases where there is already a caption file uploaded to a video, you do not need to use Amara at all, as it is usually much easier to translate the existing file instead.
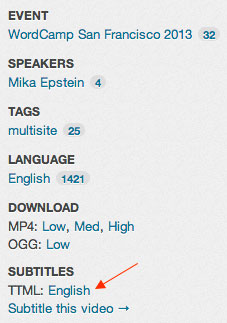
Step 1 – Locate the existing .ttml file
Load the page for the video you would like to add a translation for. You can find the TTML link under the Subtitles section of the video information sidebar.
Step 2 – Download and open the .ttml file
Download the existing caption file and then open it in a simple text-editor like Notepad or TextEdit. Avoid using applications like Word or Dreamweaver, because they will distort the TTML markup.
Step 3 – Translate subtitle text
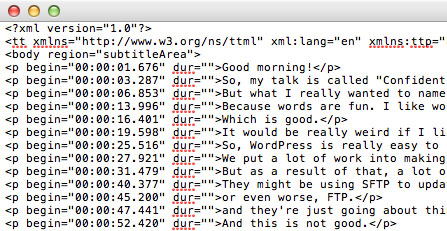
Inside the downloaded file, you’ll see the speaker’s words surrounded by <p> and </p> tags. Translate all of the speaker’s words into your language, but be careful not to change the surrounding <p> tags at all.
Step 4 – Change the language abbreviation
Locate xml:lang=”en” near the top of the TTML document, and change the two letter language abbreviation to the language you are translating the file into.
For example, if you are translating the file into German, you would change this to xml:lang=”de” instead. If you are not sure what abbreviation to use, here is a list of common two letter country codes
Step 5 – Save and upload your translated caption file
When you’re finished, save the file—being sure to use the original TTML file extension—and return to the WordPress.tv video page, then click on the “Subtitle this video” button at the bottom of the sidebar.
On the next page, choose your file for upload, select your language from the drop-down selector, and then click Submit button.
Success! Your subtitles will go through a short moderation process, and then you can enjoy your newly captioned video in all its text-enriched glory. Thank you for helping out! 🙂
An  Brainchild
